7.31.2011

Shop update


Just letting you guys know that I added a few scrap bundles to the shop. I also will have more market totes up soon.

Thrifting 7.30.11

I usually go to estate sales and thrifting on the weekends, unless I am completely tired or have something else planned. Yesterday there were no estate sales (tear!) and I didn't exactly want to go to thrift stores. So I stayed home a good part of the morning making more market bags. I pulled out my vintage bias tape baskets to coordinate tape with market totes, and I realized that I was out a few colors. So I headed out thrifting. My two fave places to get bias tape from are Angel's Antiques and Harvest Thrift Mission. They are both extremely huge and have so many vintage crafting supplies. Actually both of them are in old Wal-Mart buildings.
Anyway, I headed to the antique shop and picked up a few packs for a few bucks and picked up twice as many packs plus a a few other items at the thrift store for the exact same I paid at the other place. Ha! Plus I get a 20% discount with my college I.D. at Harvest. All in all I accomplished what I wanted which was to re-up on my vintage binding, and lo! did I!

Vintage tapes


I actually bought a few more packs than this but already started using them on the totes.

Vintage buttons


How doesn't love vintage buttons?! I'm all about 'em.

Tiny owl mugs/cups


They were only a quarter apiece. There were 4. I almost took them all, but I refrained seeing as I already have an extensive collection of vintage mugs and cups. (I'll hafta bust them out for you guys one day.)

Lastly I decided to do a little spray-painting.

This little guy was all white with a red bowtie, and honestly it kinda freaked me out a bit. So he got a nice buttercream coat. Funny thing about him: the same day I bought him I saw 2 other animals at another thrift store exactly like him. There was a mouse with a painted bowtie and 3 holes in his ears and an elephant with a painted bowtie with holes in his ears. Does anyone know what they are? I thought incense holders, but I'm sure I'm terribly wrong. If anyone has a little info about them, I'd love for you to contact me.

Anyway that was what went on with me yesterday. Don't forget that I'm hosting a giveaway!

7.27.2011

{Giveaway}


Just a little note: I'm not super big on birthdays. Haven't been for awhile actually. Its sad because my blog, my daughter, and myself have all recently had birthdays and I only celebrated my daughter's birthday.
I say that to say this. I am going to celebrate my blog's birthday and mine propperly. For mine, I'm going across the country to visit one of my best friends. For my blog's, I'm having this big giveaway; this is the big surprise I was talking about.

Ok I am giving away three things. Three people will win one of the three gifts.

First up is a reversible sewing machine cover.


It's made from vintage sheets. It's reversible and ties on the sides. It measures 27" long by 17" across.


Next we have a skirt kit. In the kit you'll receive a piece of vintage sheet fabric measuring 25" long by 93" across and a piece of 1.25" width of elastic that's 1.5 yards long.

You can use my skirt tutorial or any other tute your heart desires.


Finally we have a market tote. With pockets!


It is made of completely vintage materials: vintage sheet, bias tape, and twill tape. It has 2 large convenient pockets in the front large enough to hold a wallet if you'd rather not carry a purse. It measures 20" long by 18" wide. You can fold it up and tie it and toss it in a purse or gym bag or whatever.

Ok now here comes the official stuff:
1. Must be a follower to enter.
2. Leave a comment on THIS post stating that you've joined.
3. Open to US and Canada residents only.
4. If you want additional entries, simply blog about this giveaway and post the link on this post.
5. Last day to enter is Tuesday, August 9. Winners will be chosen on Wednesday, August 10.

THANK YOU ALL!! AND I REALLY APPRECIATE EVERYONE OF YOU!!

7.25.2011

Tutorial: Gathered Skirt with Pockets

I'm back again with another tutorial. This time I have a simple summer skirt with pockets. My addiction is pockets I have to have them in everything!! I know there are millions of tutes in blogland on skirts but I decided to add my little piece to the puzzle. So let us begin!

Materials

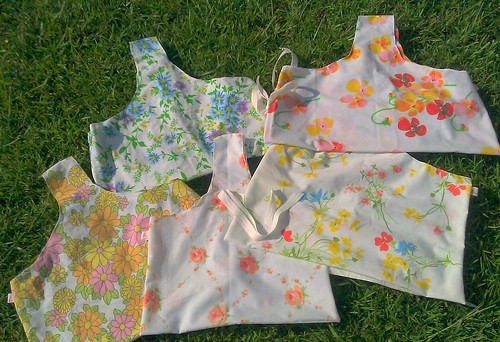
-fabric (or vintage sheet)
-elastic (at least 1 inch wide)

Measurements
Ok you will need two measurements: the length that you want the finished skirt to be and the width that you want the finished skirt to be.

LENGTH:
For the length of your skirt piece you need to add 1 inch for the hem and 2 times the width of your elastic plus 1/2 inch to the finished length number. For example if you want your skirt to be 20 inches and you have 1 inch elastic, then take (length of skirt) + 1 + 2(width of elastic) + .5. So 20+1+2+.5=23.5 inches.

WIDTH:
You will cut two skirt panels so that you can insert your pockets into. For this measurement you will need the width that you want your finished skirt to be multiplied by 1.5 plus 2 inches or (1.5xfinished skirt width)+2. So if your finished skirt is to be 30 inches wide then you will simply do this: (1.5x30)+2=47 inches. Now take this piece and cut it down the middle creating your two skirt pieces.

Making the pocket pieces
Determine how long and deep you want the pockets to be. With those figures in mind, cut a rectangle double the width and double length of those numbers. Right sides together, fold it in half lengthwise and then in half widthwise.

Cut a pattern similar to the one shown, keepig mind that the pocket bag curves downward. Place the straight edge of your pattern on the OPEN edges of your fabric. Pin and cut out.

Sewing the skirt
Now that we got all of that mathematical mumbo-jumbo outta the way we can have some fun!

Measure how far down you want your pockets to be keeping in mind that you need to come down far enough for your elastic casing. Mark this point on the left and right sides of both skirt panels.


Right sides together place the top of your pocket in top of the line you drew and pin. (Keep in mind that the pockets point down!)


Sew all four in place using a quarter inch seam.


Next you will need to place your two skirt panels together pockets flipped out and pin.


Sew as shown, using a half inch seam on both side seams.


Fold the bottom up half an inch twice iron and hem.


We are almost done!
Fold under the top edge a quarter inch. Iron.


Then fold this edge again a quarter of an inch wider than the width of your elastic. Iron.


Stitch 1/8" on the fold you just created.


Leave a few inches open to insert elastic.


Insert elastic, overlap ends, and zigzag.


Stitch the opening closed.

Now stitch a couple of evenly spaced parallel lines in the waistband stretching as you sew.


And you're done!!


What I did this weekend...

I tried to get a lot of things done this weekend, but mainly I just wanted to clean and get rid of some old junk. I didn't do a crazy amount of thrifting; in fact I only found a pieces that I thought I would like to have. I'll show those later. I did, however, get some sewing done.
First off we have a sewing machine cover, and as you can guess it is made from sheets.


It's reversible


I also made some mini fabric-bound notebooks. I have a jar of scraps that I'm trying to use up, and this seemed like a good idea.


I took part in a Casual Summer Clutch swap on swap-bot. Here's the clutch for my partner:


I hope she likes it.


I made a dry erase board from a vintage sheet scrap and a clip frame.


And last week I started on some racerback tanks, and I finally finished one of them.


These are the shirts before I finished them. They have a vintage sheet yoke in the back.

This is the finished product


I love the way it feels. I think I'm going to start making all of my own racerback tanks. They are my summer must-have for working in the printshop among all the other summer events going on.

Well I do think that is what I've gotten finished this weekend. Oh yeah! I was also working on some necklace holders. Hopefully I'll have those up later this week if it ever has a clear enough day for me to paint.

And another small note: I have a BIG surprise coming up very soon so guys stay tuned! You won't wanna miss it!!

7.23.2011

Shop Update


Just letting you guys know that I added the market totes to my shop. Go take a look. :)

7.21.2011

Vintage sheet market totes

Vintage sheet market totes by lani5287
Vintage sheet market totes, a photo by lani5287 on Flickr.

Those of you who sew know how extremely time-consuming and tiring massly producing your design can be. I once made 7 lined clutches one night for a craft show the next day and 13 zippered wallets for a a Christmas craft exchange at work and that was some enervating work. I was so exhausted from all of that. I learned my lesson: Cut pieces first and sew everything after all materials are set out and situated. Well last night I finally felt like sewing and not because I had to. I wanted to make a gang of market totes. I mean a whole slew of them. I only got 5 done, but I didn't take super long to do them. I cut all my pattern pieces out, my ties and my labels first. Then I sewed them all together and finished the seams after. This method moved through quite quickly. In fact I was able to sew 4 of them this morning before work ( I finished one last night before bed.) in case you can't tell, I LOVE vintage sheets!! And I'm glad I can go even greemer buy rescuing them from the landfill and making bags to keep plastic bags out of the landfill (hopefully!) These will be in the shop by the weekend.

7.19.2011

Two totes, One night

I've been in a sewing slump here lately, which is a HUGE problem because I've signed up for a ton of sewing swaps on swap-bot. Although I have been creating things, there are not a lot of things I have been sewing. I feel kind of bad. Well last night, I tucked away my enervated feeling and got to work. I completed 3 swaps last night; one I had items already prepared for and the other two I sewed for. I made 2 totes, actually one tote and one market bag. I know there is no real difference, lol.

The first bag I made is for a Tote Bag swap.

I used my favorite medium, vintage sheets. I used two coordinating sheets in hues of blue and purple. I created a ruffled flower for the front with a button center.
The flower fabric matches the lining.


I used some vintage fabric piping that I picked up at the antique mall this weekend.

I think the piping adds a wonderful contrast to the lighter outside fabric.

The second bag I made is for Round 13 Craft a Surprise swap. I participated in the last round of this swap, and it was quite fun. So I decided to try it again.
I had so much fun making up this package for the simple fact that my partner and I share so many likes. When I saw that she liked vintage sheets and reusable bags, I jumped right into an idea. I've been toying around with making simple, fuss-free and quick-to-make reusable totes; and last night I got the opportunity to send one.

It was so quick and easy. The binding was the most tedious thing on this project (mostly because I was on Facebook. I know, sad, right!) So she is receiving the tote, some snips of vintage sheets, vintage pearl buttons, and bird stamps.

I'm so excited! I really hope they all enjoy their gifts. I'm off to the post office!! Bye! and Have a wonderful day!!!